


How do I Use Ns2 on Window 10
Do you want to know about the process of using network simulator 2 in windows 10? Is yes, they take a look at this article because here our technical experts have highlighted required process to use network simulator 2 on windows 10.
Step: 1 Download VMware and Ubuntu
Initially, we have to download the VMware tool 12.2.0 from the URL what we have highlighted in the following to integrate the Ubuntu with windows 10.
Following that, we have to download the Ubuntu 18.04.6 LTS iso file through the link highlighted below to install Ns2 simulator.
https://releases.ubuntu.com/bionic/
When the Ubuntu iso file is downloaded, we have to install the Ubuntu into VMware tool.
Step: 2 Download and Install Ns2 on Windows 10
The packages based on network simulator 2 have to be downloaded in windows 10 using the below mentioned URL.
https://github.com/idmidr/ns-allinone-2.35.git
Then, we have to install Ns2 on windows 10 through the implementation of below mentioned commands.
cd ns-allinone-2.35/
sudo ./install

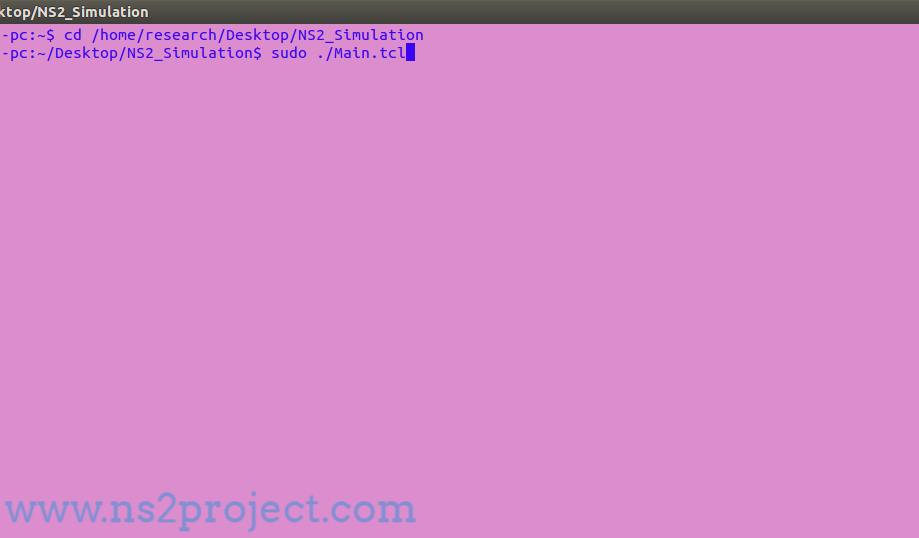
Step: 3 Create and Execute Ns2 Simulation on Windows 10
To create Ns2 simulation, we have to create the tcl script file in the workspace location and integrate all the algorithm codes. Then, we have to implement the Ns2 simulation through the execution below mentioned commands.
cd /home/research/Desktop/NS2_Simulation
sudo ./Main.tcl
If you are struggling somewhere, then feel free to reach us and acquire the best knowledge.