


Installing ns3
Let’s take a look over the installation process of network simulator 3 through this article “installing ns3”.
Install Supporting Packages
Initially, we have to install the supporting packages for the network simulator-3 installation through the implementation of the following commands.
sudo apt-get install gcc g++ python python-dev qt4-dev-tools libqt4-dev mercurial bzr cmake libc6-dev libc6-dev-i386 g++-multilib gdb valgrind gsl-bin libgsl0-dev libgsl0ldbl flex bison libfl-dev tcpdump sqlite sqlite3 libsqlite3-dev libxml2 libxml2-dev libgtk2.0-0 libgtk2.0-dev vtun lxc uncrustify doxygen graphviz imagemagick texlive texlive-extra-utils texlive-latex-extra texlive-font-utils texlive-lang-portuguese dvipng python-sphinx dia python-pygraphviz python-kiwi python-pygoocanvas libgoocanvas-dev ipython libboost-signals-dev libboost-filesystem-dev openmpi-bin openmpi-common openmpi-doc libopenmpi-de
Download Ns-3 Dev
Then, we have to download the packages based on ns-3 through the below mentioned URL,

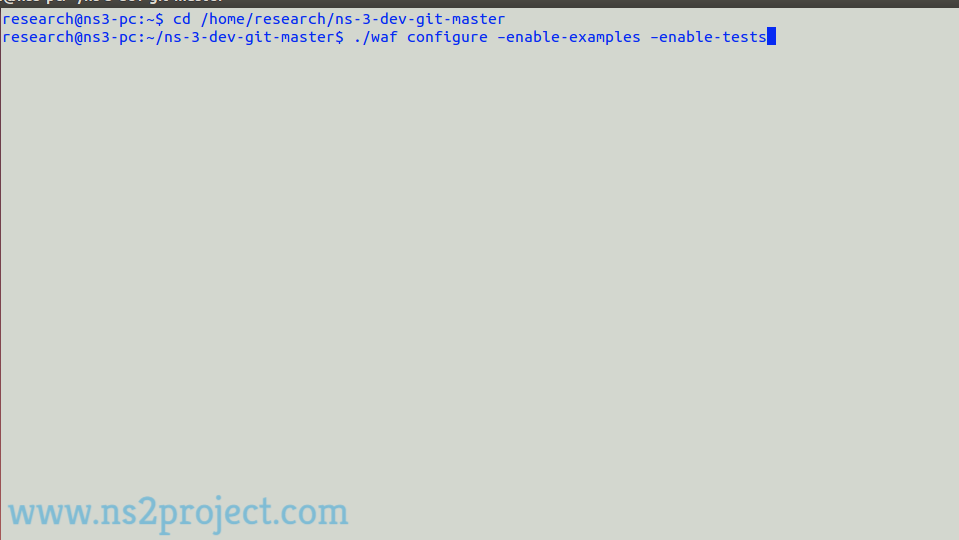
Configure Ns-3 Dev
Consequently, we have to configure the downloaded ns3 packages through the execution of below mentioned commands.
cd ns-3-dev
./waf configure –enable-examples –enable-tests
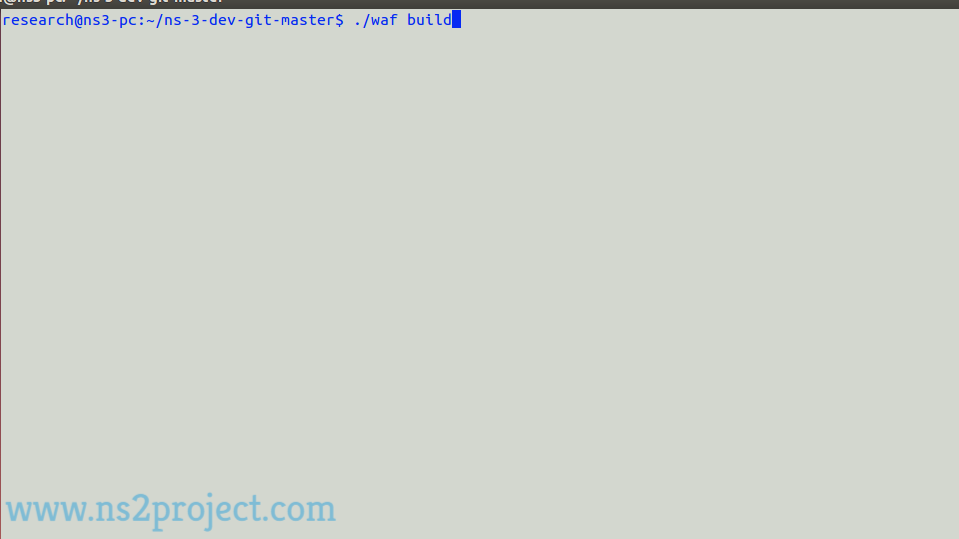
Install Ns-3-dev
After completing the configuration process, we have to install the packages based on Ns-3 dev.
./waf build
In addition, we are providing the complete research support for the research scholars. So, reach us to aid more guidance.